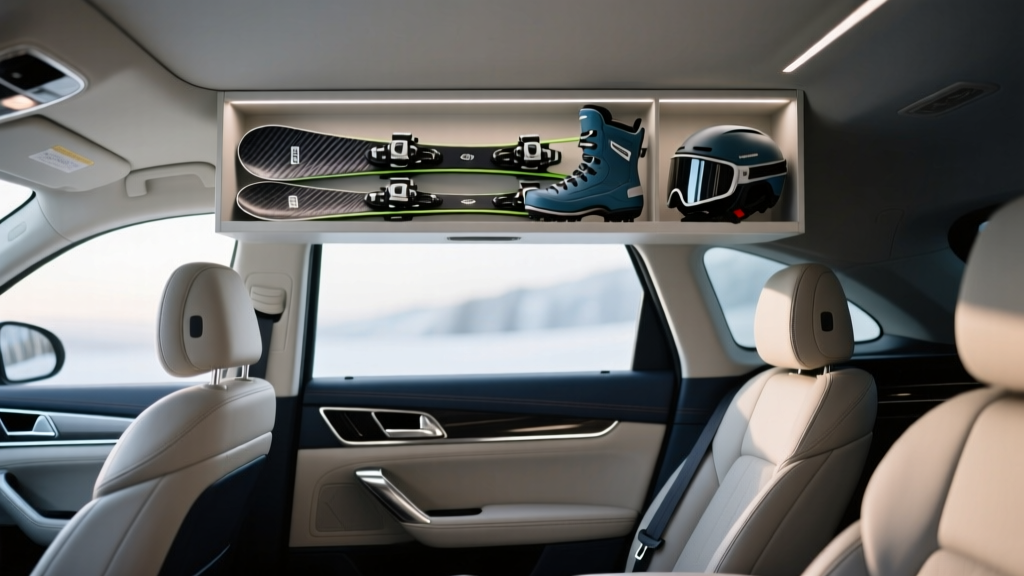
Ski Equipment Storage Upgrade | CarInteriorMix
If you?ve ever tossed skis, poles, and soggy boots into the back of your car ?just for the drive home,? you already know the problem: melted snow becomes mystery puddles, sharp edges nick interior trim, and gear shifts around during braking. Beyond the mess, poor ski storage can become a safety issue?loose equipment can turn into projectiles in a sudden stop, and wet gear can lead to mildew smells that linger in your cabin for weeks.
A professional-level ski storage setup doesn?t have to mean a full vehicle conversion or expensive custom carpentry. With the right combination of racks, liners, tie-downs, and a few smart workflow tweaks, you can upgrade your car interior so it stays clean, organized, and ready for every ski day. This guide walks through practical options for sedans, hatchbacks, SUVs, and wagons, with step-by-step instructions and real-world tips you can apply right away.
The goal is simple: protect your car interior, protect your gear, and make loading/unloading fast?so the only thing you?re thinking about is the next run.
Start With a Quick Assessment: Your Car, Your Gear, Your Habits
Before you buy anything, take five minutes to map out what you?re actually carrying and how you use your vehicle. A ?professional? upgrade is less about price and more about having a repeatable system.
Measure the essentials
- Skis/boards: length (cm), number of pairs, whether you carry powder skis (wider) or race skis (narrower).
- Poles: count and typical storage (bundled with skis or separate).
- Boots: how many pairs, and whether you want them in-cabin (heated/dry) or cargo area.
- Wet items: helmet, gloves, skins, base layers?these drive your moisture-control needs.
Know your constraints
- Passenger needs: Do you carry 4 people regularly, or is it usually 1?2?
- Interior materials: light carpet and leather show salt stains faster than darker interiors.
- Access points: hatch opening height, rear seat fold split (60/40), presence of pass-through.
- Parking reality: roof racks are great?unless you park in low garages daily.
Pick your storage strategy
Most car owners land in one of these setups:
- Roof-first: Skis/boards up top, boots and bags inside.
- Interior tunnel: Skis inside through a pass-through or folded seat section; everything else in cargo.
- All-cargo system: For SUVs/wagons: skis diagonally or in a dedicated ski sack with tie-downs.
Upgrade Path #1: Roof Rack + Interior Protection (Best for Space and Safety)
A roof rack system is the cleanest way to keep sharp, wet gear out of your cabin?especially if you travel with passengers. It?s also the closest thing to ?set it and forget it? once installed.
Recommended setup options
- Ski/snowboard clamp rack: Fast loading; great for frequent ski days.
- Roof box (cargo box): Best weather protection and theft resistance; holds more gear but costs more.
Product recommendations (what to look for)
You?ll see premium brands like Thule and Yakima dominate for good reason: better locks, less wind noise, and long-term durability. Mid-range brands can work, but pay close attention to locking quality and clamp padding.
- Clamp racks: Look for wide jaws (for powder skis), easy glove-friendly buttons, and integrated locks.
- Roof boxes: Look for dual-side opening, a rigid latch system, interior tie-down points, and a size that won?t block your rear hatch.
Step-by-step: dialing in a roof setup
- Confirm your roof baseline: Factory rails, fixed points, or bare roof. Buy crossbars that match your exact vehicle fitment.
- Set crossbar spacing: Follow rack manufacturer guidance?too close increases flex; too wide can interfere with roof box hardware.
- Torque properly: Tighten mounts evenly. Over-tightening can deform rails; under-tightening risks movement.
- Mount the ski rack/box: Center it for weight distribution and to keep hatch clearance.
- Load smart: Bases facing each other to protect edges; use straps in a box so gear can?t shift.
- Do a shake test: Grab the rack and rock it?your car should move more than the rack does.
Real-world tip: reduce ice build-up
If you?re using a clamp rack, brush heavy snow off skis before clamping. Ice buildup can freeze jaws shut and stress hinges. A small brush lives nicely in a door pocket all season.
Upgrade Path #2: Interior Ski Storage System (Best for Daily Drivers and Garage Parking)
If roof storage isn?t ideal?garage clearance, extreme cold, or you prefer to keep gear out of road grime?an interior system can be just as ?pro? when done right.
Best interior solutions by vehicle type
- Sedan with pass-through: Use a ski bag plus a seatback protector; skis run down the center.
- Hatchback/wagon: Use a cargo liner + tie-downs; skis go diagonally or along one side.
- SUV: Create a dedicated lane with a divider or cargo barrier; add a rubber mat for boots.
What to buy (practical, high-impact gear)
- Waterproof cargo liner: A molded liner or heavy-duty rubber mat to catch meltwater and salt.
- Seatback protectors: Covers for rear seatbacks when folded; prevents edge scratches and grime.
- Ski bag/sleeve: Keeps edges from chewing up trim; reduces wet mess.
- Anchor straps + cam buckles: For securing ski bags to cargo tie-down points.
- Cargo net or rigid divider: Keeps helmets and loose gear from rolling forward.
Step-by-step: building an interior ?ski lane?
- Clear the cargo area: Remove unnecessary items so you?re not soaking random bags and tools.
- Install a liner: Fit a waterproof cargo liner (or rubber mat) that covers the full floor and edges.
- Protect the seatbacks: Add seatback protectors before you fold seats down?edges and bindings are interior killers.
- Use a ski bag: Put skis/poles in a bag or sleeve. If you don?t have one, at least wrap edges with a towel or edge guards.
- Position the load: Place skis low and stable (flat on the floor), keeping bindings from pressing into plastic panels.
- Secure it: Use cam straps to tie the bag to factory cargo hooks. Tighten just enough to prevent sliding.
- Create a ?wet zone?: Keep boots on a separate rubber tray near the hatch to contain slush.
Real-world example: the two-person weekend setup
- Skis: In a padded ski sleeve, strapped to left cargo hook points.
- Boots: In a shallow rubber trunk tray on the right side.
- Helmets and gloves: In a collapsible bin secured with a cargo net.
- Wet layers: In a vented mesh bag clipped to a tie-down ring (so it?s not sitting in a puddle).
Moisture Management: The Upgrade Most People Skip
Professional ski storage is as much about drying strategy as it is about organization. Wet gear left in a sealed cabin can cause foggy windows, musty odors, and long-term mildew in carpets and seat foam.
Simple moisture control wins
- Dedicated boot tray: A rubber tray with a lip prevents meltwater from spreading.
- Microfiber towels: Keep two: one for wiping skis/bindings, one for boots.
- Ventilation: Crack windows slightly when safe, or use your HVAC to dehumidify on the drive home.
- Desiccant packs: Rechargeable dehumidifier packs help in enclosed cargo areas (especially helpful for overnight trips).
Pro tip: protect the ?salt line?
Road salt is brutal on interior carpet and door sills. If you?re stepping in and out with boots, add a door-sill protector film or a removable sill cover. It?s a small upgrade that keeps your interior looking newer for longer.
Security and Safety: Keep Gear From Becoming a Hazard
Even lightweight poles can become dangerous in a hard stop. The fix is straightforward: contain, strap, and separate.
Safety checklist for ski transport
- No loose gear: Helmets, boots, and bags should be in bins, nets, or strapped down.
- Heavy items low: Boots and tool kits go on the floor, not stacked on top of skis.
- Use factory anchors: Tie into cargo hooks and anchor points designed for loads.
- Consider a cargo barrier: For SUVs, a barrier adds peace of mind if the cargo area is packed.
Product Comparisons: What?s Worth Paying For?
Roof box vs. clamp rack
- Roof box: Better weather protection, cleaner skis, more secure, holds extras (layers, small bags). Costs more and can reduce fuel economy more noticeably.
- Clamp rack: Lower cost, faster on/off, less bulky. Skis are exposed to road grime and ice; security varies by model.
Molded cargo liner vs. universal rubber mat
- Molded liner (vehicle-specific): Best coverage and fit, catches spillover at edges, looks OEM-clean.
- Universal mat: Cheaper and flexible, but can slide and may leave gaps where slush escapes.
Padded ski bag vs. basic sleeve
- Padded bag: Better for protecting interiors and skis; helpful if you?re stacking multiple pairs.
- Basic sleeve: Lighter and cheaper; still a big improvement over bare skis on carpet.
Common Mistakes to Avoid
- Skipping tie-downs: A cargo mat alone doesn?t stop gear from sliding.
- Letting edges touch upholstery: Ski edges can cut seat fabric and mark plastic panels quickly.
- Storing wet boots on carpet: You?ll get salt stains and odor that?s hard to remove.
- Overloading roof gear: Exceeding roof load limits affects handling and can damage mounting points. Check your vehicle manual and rack rating.
- Forgetting hatch clearance: Roof boxes can block hatch opening on some vehicles?test before final tightening.
- Leaving gear in the car overnight: Moisture lingers, and theft risk increases. Make unloading part of your routine.
FAQ: Professional Ski Equipment Storage in Your Car
1) Is it better to store skis inside the car or on the roof?
Roof storage keeps wet, sharp gear out of the cabin and is great for passenger space. Interior storage is ideal if you want cleaner gear, have garage height limits, or prefer less wind noise. Many enthusiasts use a hybrid: skis on the roof, boots inside for warmth and drying.
2) How do I stop my car from smelling like wet ski gear?
Use a rubber boot tray, wipe down boots and bindings before loading, and keep wet layers in a vented bag instead of a sealed tote. Run the HVAC in defrost mode (A/C on) during the drive home to pull moisture out of the cabin air.
3) Will a cargo liner really make a difference?
Yes?especially in winter. A molded cargo liner contains meltwater and salt at the edges where carpet is hardest to clean. Pair it with a small towel routine and you?ll avoid the ?winter trunk stain? that builds up over time.
4) How should I secure skis in the cargo area?
Put skis in a bag or sleeve, lay them flat on the floor, and strap them to factory cargo hooks with cam buckle straps. The goal is zero sliding under braking and no contact with side panels.
5) What?s the best solution for a sedan with limited cargo space?
If you have a rear seat pass-through, use a ski bag through the center and protect seatbacks and side bolsters. If not, a roof clamp rack is often the most practical upgrade for sedans.
6) Are roof boxes safe in heavy snow and highway driving?
When properly installed within rated limits, yes. Keep crossbars torqued correctly, distribute weight evenly, and periodically check mounts on long trips. Brush heavy snow off the box before opening to avoid dumping snow into the cabin.
Your Next Steps: Build a System You?ll Actually Use
If you want the biggest improvement with the least effort, start with three essentials: a waterproof cargo liner, a ski sleeve/bag, and two tie-down straps. That combination alone prevents most interior damage and keeps gear from sliding. From there, decide whether a roof rack or roof box fits your lifestyle?especially if you regularly carry passengers or multiple ski setups.
Make it a habit to do a 60-second reset after each ski day: wipe down wet items, shake out mats, and unload anything that shouldn?t sit overnight. Your car stays fresh, your gear lasts longer, and your next trip starts stress-free.
For more practical car interior upgrades?liners, organizers, seat protection, and seasonal care?browse the latest guides on carinteriormix.com.